Mistakes to avoid when starting as a photographer
Time to pause and reflect.
In my first year of photography I took over 15,000 pictures. I have gotten many right, but have gotten a few (cough, cough, more than a few) wrong. Or at least, they could have been better. I am sure that this is something I will keep writing and writing about as I go along and learn more. However, here is what have I learned from the shots.
#1 Not Realizing the Power of The Camera
This is actual a literal thing. Not some philosophical thing about the power of a picture and how it might touch your soul or any of the reasons we love photography. The #1 mistake I see or did was trying to perfectly frame my subject in the photo vs realizing and recognizing that this camera is amazing. You can shoot wide and crop later.
The photo of the skeleton below is a prime example. I was walking through the grasslands of Patagonia and paused to admire the skeleton and had enough instinct to want to frame the skeleton as my foreground element but not enough experience to give myself more flexibility later on how I wanted to crop the picture. Many people love this picture but I also made mistake #2 in this picture.

#2 Bracketing
No. Not the NCAA tourney and winning the $1m from Warren Buffett. Bracketing as in taking a property exposed shot, an underexposed shot, and an overexposed shot. There are many reasons to do this aside from filling up your memory card with 3x as many photos as before. From HDR options to layering in Photoshop, to not having to be as spot on in your photo exposures. When I got my Nikon D810 I was so excited and honestly overwhelmed by all of the features it had that I couldn’t wrap my brain around why I should bracket and how to do it. After I learned how to do it, I realized just how amazingly simple it was. I also was under the impression you had to be on a tripod to bracket and for image alignment. Wrong again. Doh.
Why should I have bracketed that photo? Because I could have captured the depth of the clouds and the shadows and if I wanted to get complex layered later in Photoshop… but even simpler: I stand a better chance at “guessing right” on the exposure and having a more workable photo. Mark Wallace with Adorama has a pretty good tutorial which you can watch here that will hopefully point you in the right direction.

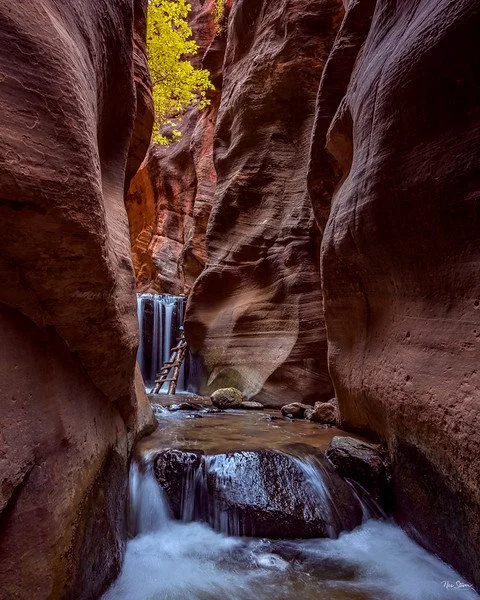
#3 Don’t Fear the Vertical
For some being a landscape photographer, it is all about the landscape pano. The horizontal picture that captures it all. Except when it isn’t. Serge Ramelli calls them Vertoramas and has a great tutorial on them that you can view here. And don’t forget that you can do vertical panoramas with your iPhone. Just click the arrow and it will change directions. Pretty cool. Matt Kloskowski breaks it down simply and shows some simple examples that are quite compelling at this link.
When I got my tripod, I was so excited. I never would have thought there was actually a bracket you could attach to it that would allow you to rotate your camera vertically. Very cheap. Easy to install. Haoge Vertical Shoot QR Quick Release. It would have greatly improved some of my canyon and other shots to show the scale and size more dramatically. The below shot illustrates how shooting vertically was the only way to capture the scene. From the fall colors in the tree above the falls to the falls themselves and the foreground of the river.
Oh… don’t worry the list goes on. But in general, these have been the most recurring and frustrating themes I have seen emerge in my own work.